Let’s Enjoy Extreme High Effciency Using Examples

After installing MaProMesh User can enjoy Rapid Pre to Post Calculation immediately.

First of all Please Check whether MaproMesh adapt  to bConverged Calculix (ccx.bat) automatically and correctly.

do_exam_0

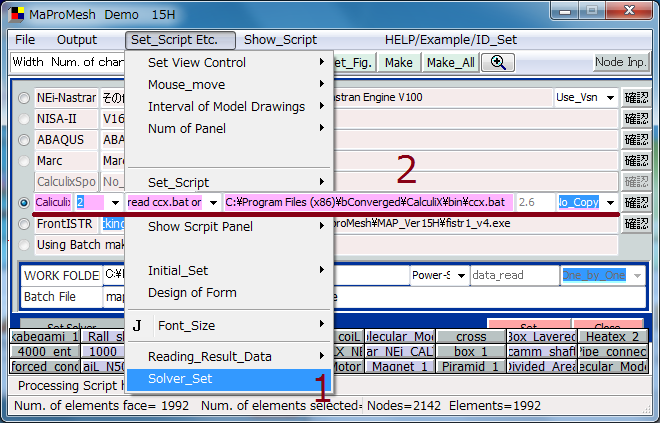
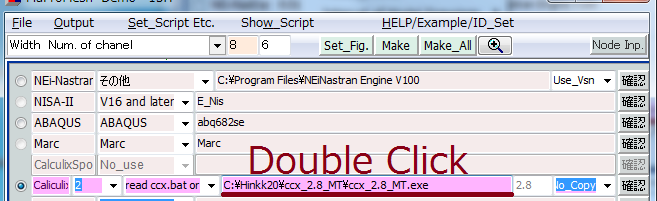
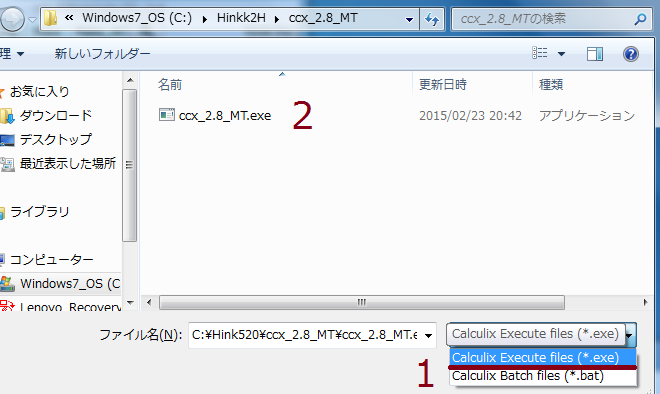
If not adapted. Double Click and read ccx.exe then user can set Calculix easily & quickly.

do_exam_0A

do_exam_0B

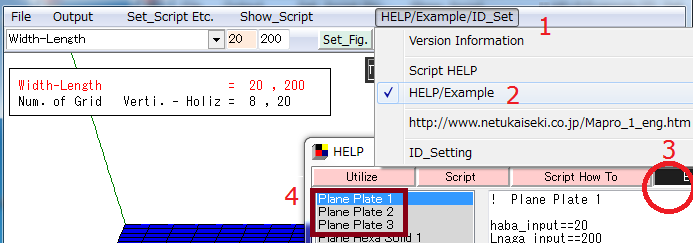
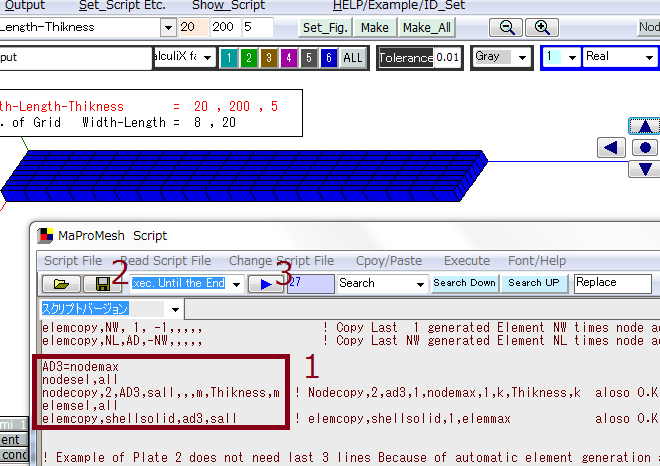
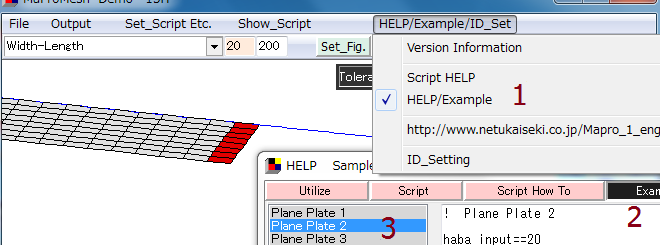
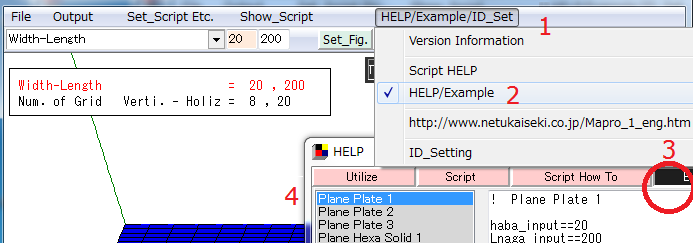
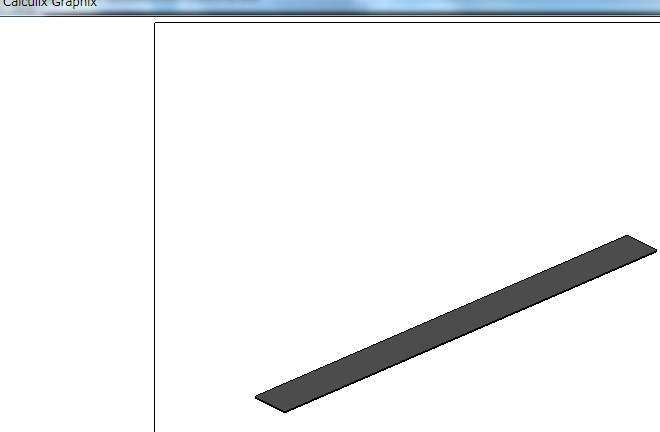
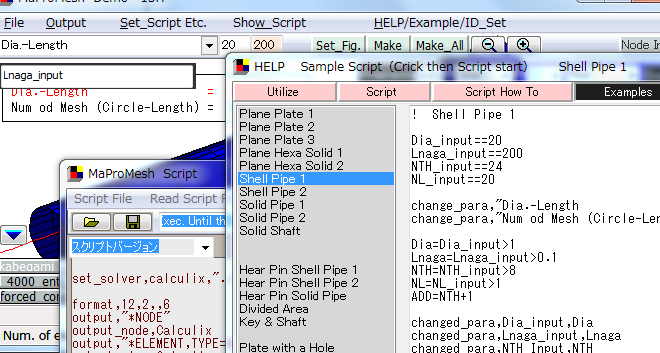
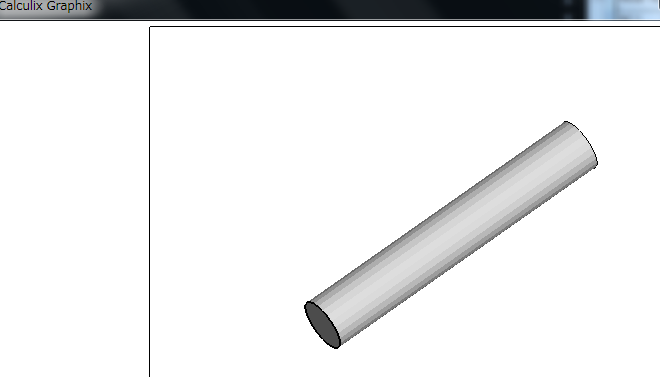
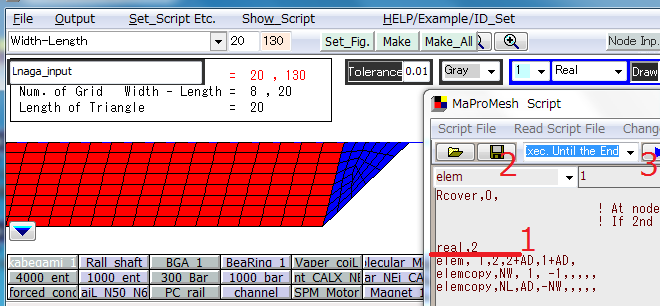
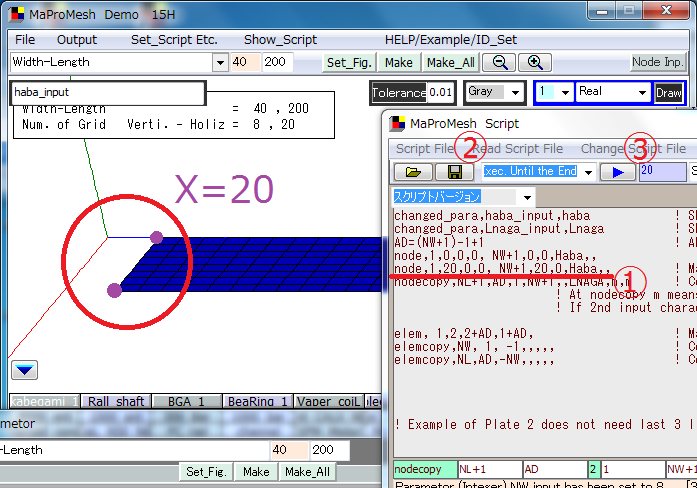
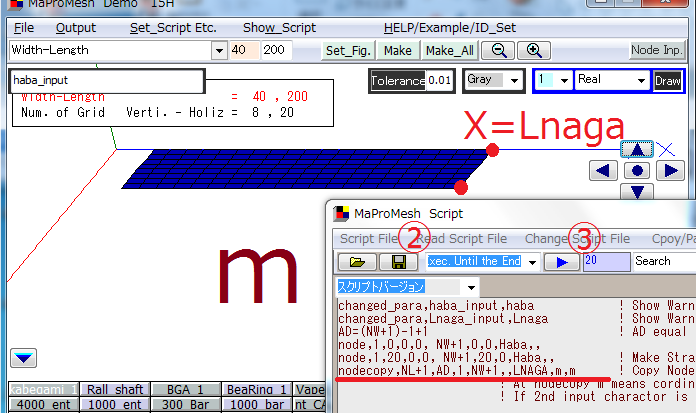
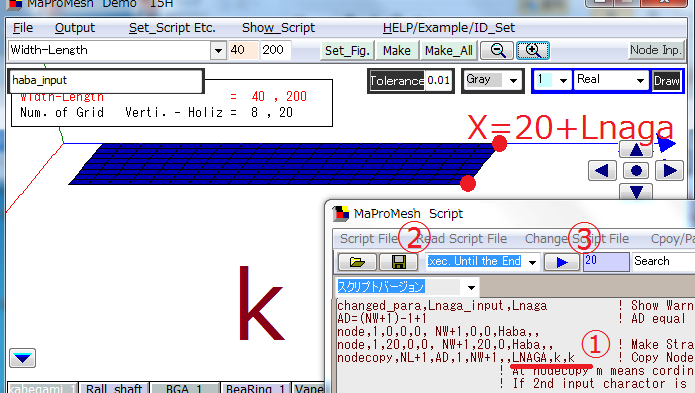
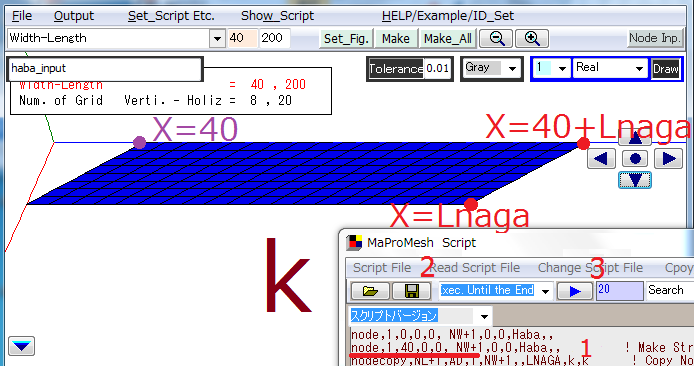
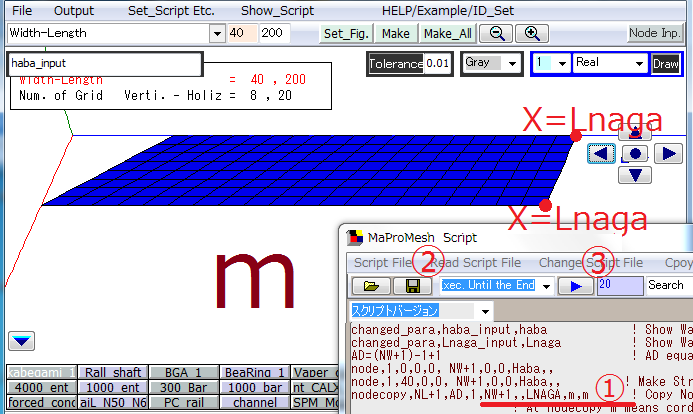
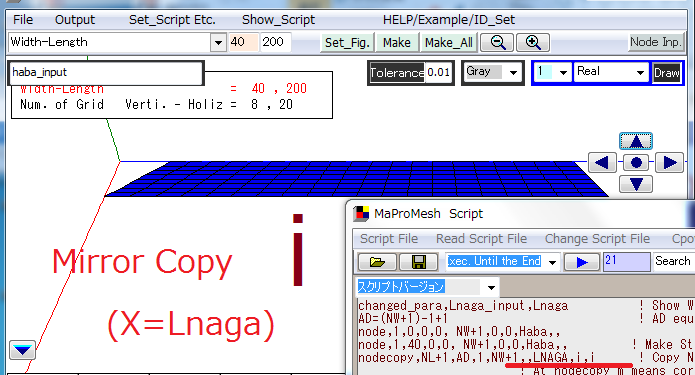
Let’s Click Example Button and Start Finite Element Calculation!

do_exam_1

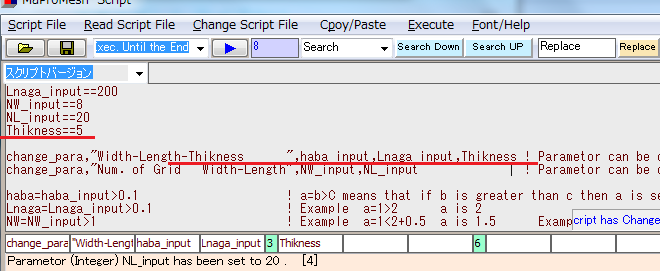
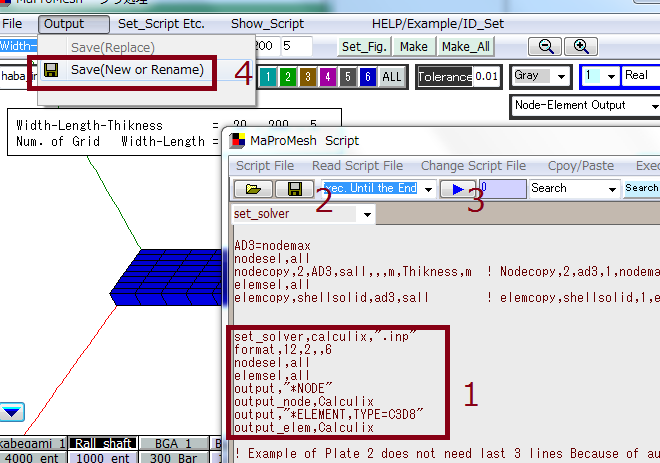
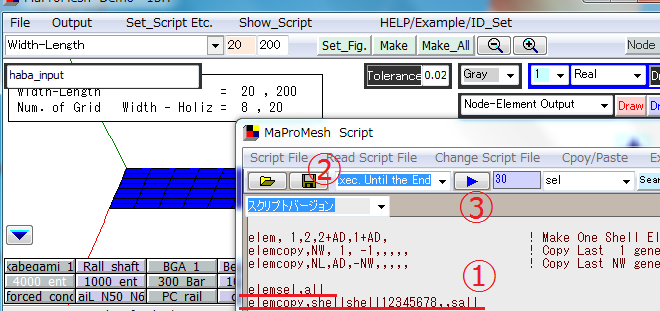
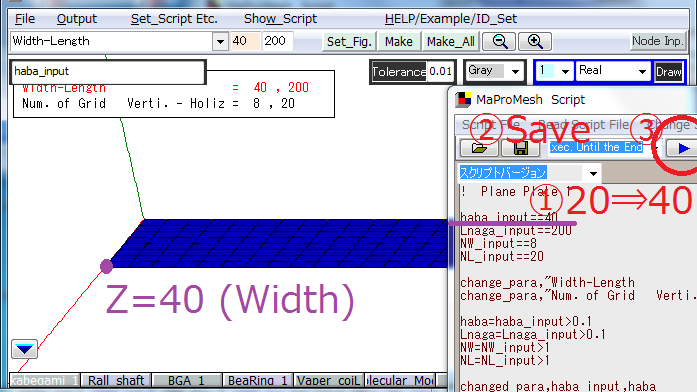
User cannot do mistake because  its too Easy.  Please Save Data and Click Start Button.

do_exam_2

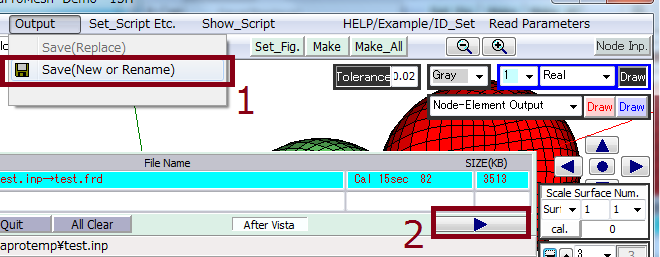
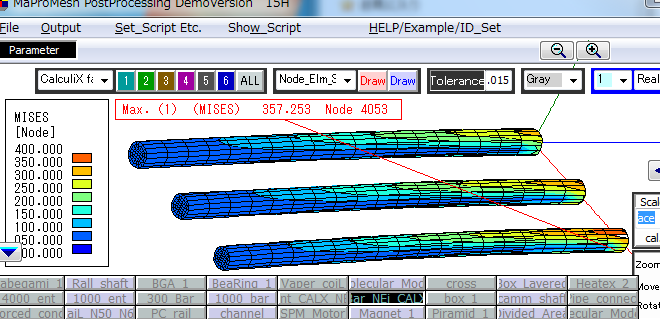
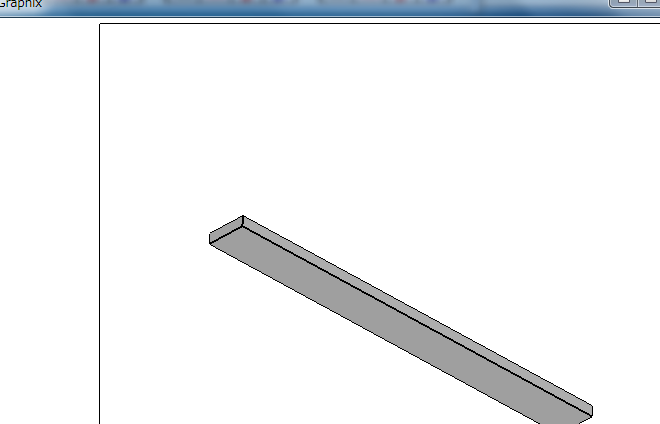
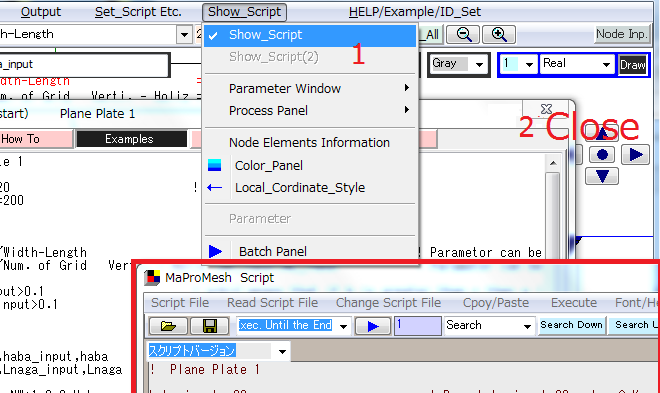
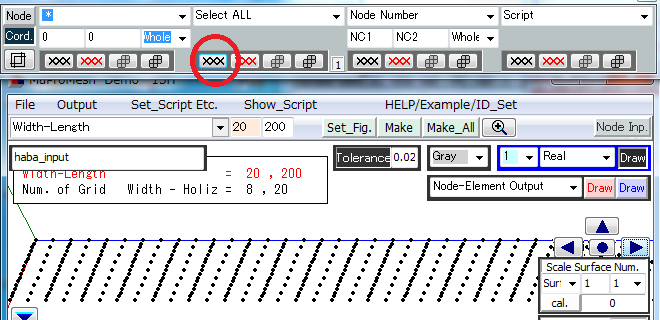
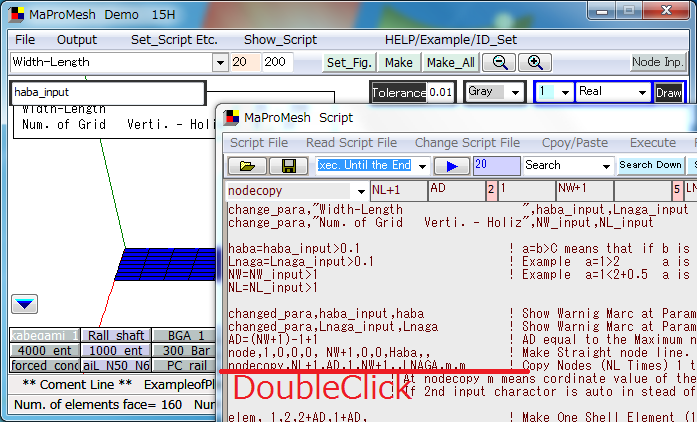
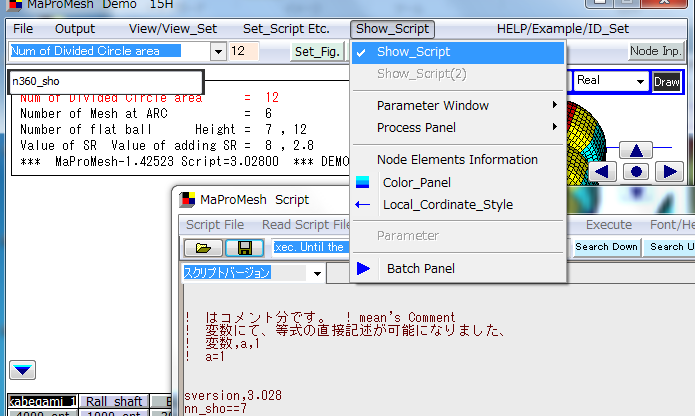
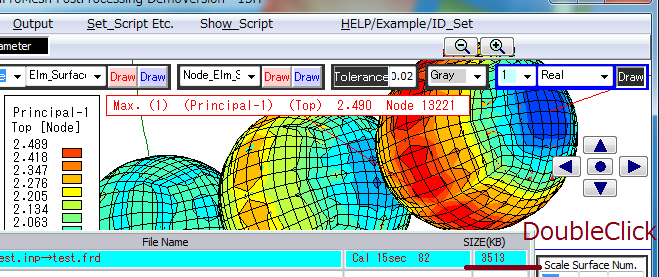
Please Double Click Text Box then Post Processing will be start.

do_exam_3

do_exam_4

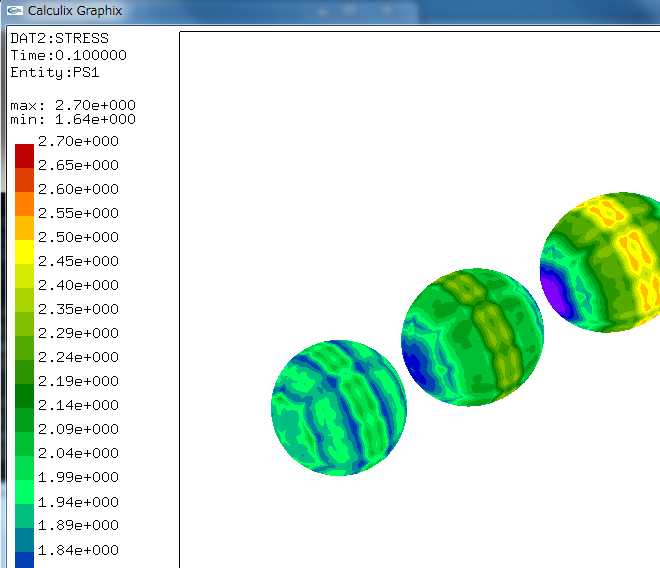
User can enjoy several examples without lesson.

do_exam_5


Let’s Arrange Plane Plate and Make Solid Model Calculix Input File.

Let’s Pick Up one of the Examples of Plane Plate.

start_dscrip_1

edge_start_2

Add 1 line and arrange 1 line for giving Parameter of Thikness.

make_into_sol_1

Add 3 lines in order to Copy Nodes to Y direction.

Add 2 lines (Totally add 5 lines )for making solid Elements from the Shell elements.

make_into_sol_2

Add 7lines then Output GUI(4)will be enabled.

make_into_sol_3

Let’s Save  Calculix Input File.(.inp).

Double Click of saved data bring you  3D Picture of bConverged Calculix CGX.make_into_sol_4


Let’s Add Edge to the example Plane Plate 2 (2nd Edition)

Let’s make  2nd example of plate with edge from now.

node_copy_5

Let’s Pick up example script Plane_Plate_2

edge_start_1

edge_start_2

Let’s check that nodes NC1 and NC2 are on the Edge.

node_copy_1

Add 2 Lines and arrange 1 line to the script.

edge_start_1A

Last Brown Line means Copy Nodes from NC1 to NC2 for getting Angled Edge Plate.

edge_start_2A

Arrange of the Script has finished. Enjoy  Parametric  Modeling!  just as 1st Picture.


Using 2 lines last brown one line can be written down as follows.

nodesel,n,n,NC1,NC2      ! Select nodes NC1 to NC2 Step 1.

nodecopy,J+1,AD,sall,z,,Edge_Length*cos(edge_angle),Edge_Length*sin(edge_angle),k,,NC3,NC4,1

Copy selected nodes(NC1 to NC2) order at z direction.

Let’s Make Calculix Inputfile!

start_dscrip_1_new

start_dscrip_2

At Calculix Shell must be 8-node-shell(S8).

cal_make_1

Last Script automatically generate additional 4-nodes for the construction of 8-Node-Shells.

Each Element  consist of 8 node.

cal_make_2

Writing down like this and save and execute the script.

cal_make_3

Output GUI become enable so user can save Calculix inputfile.

cal_make_4

Double Clicking of saved data bring you  3D Picture of bConverged Calculix CGX.

cal_make_5

To apply same arrange to the pipe examples bring you  Calculix input file of Pipe Model.

cal_make_P1

cal_make_P2


Let’s Define Node Number! & Add Triangle

start_dscrip_1_new

start_dscrip_2

Double Click the sentence user can use Script Guide Assistance.

copy_n1

Fill Text Box(1) and Click Write Button(2) then changing of the sentence would finished.

copy_n2

Directory Writing down to Editor

nodecopy,NL+1,AD,1,NW+1,,LNAGA,m,m,,NC1,NC2  also OK .  Please Save the Script.

copy_n3

Following Scripts are same. but require two more Lines.Upper one is efficient.

copy_n4

Lower Picture shows that Node NC1 and Nc2 has Defined at the Edge.

node_copy_1

Let’s Check Cylindrical coordinate for making Triangle!

node_copy_2

copy_n6

xxj(nc1) means X coordinate of Node NC1. That is Same with Lnaga.

Writing down Cylind,Lnaga+Len_tri,0,0,-90,0  In stead of (3) also O.K.

copy_n7

Using Selected Nodes Making Triangle has successfully finished.

Rcover make both Nodes and Elements.User can Check  selected nodes NC1 to NC2.

copy_n8

After that User can enjoy parametric modeling of Length Width and Number of the Mesh

node_copy_3

Example of Plate set to 1 and  Edge set to 2.

copy_n9

Example of Plate set to 2 and  Edge set to 1.

copy_n10


Let’s Arrange the Demo Script!

start_dscrip_1_new

start_dscrip_2

Change the Value of haba_input to 40 from 20.  After the save width of The Plate become Wide.

start_dscrip_3

Change the Coordinate of X to 20 and save.  Coordinate X of the Edge change.

start_dscrip_4

(Lnaga,m,m,) means Coordinate of Last copied nodes  are (Lnaga,Original-Y,Original-Z)

start_dscrip_5

(Lnaga,k,k,) means Coordinate of Last copied nodes  are (20+Lnaga,Original-Y,Original-Z) Because X coordinate of Nodes 1 to NW+1 are 20.

start_dscrip_6

start_dscrip_7

start_dscrip_8

start_dscrip_9


Uploading has completed

Demo version is Complete Free for downloading and using.

Please go to the Download Site. And Please read agreement that installer shows.

If agree then click and proceed to install MaProMesh_Demo_Version.

***  http://www.netukaiseki.co.jp/mapro_down_eng.htm ***

intro_1

Most easy examples are making of plane plate.

start_dscrip_1

Using Script user can make whole finite element input data (both Mesh and boundary conditions)

I will add the  contents especially  about how to construct finite element model with boundary conditions.